Element Style Rules determine the default appearance of elements in the project. Such style rules can be bound to specific elements (e.g. all Drag Items) and even to specific states of elements (e.g. all Dropped Drag Items).
Create or Replace
The default appearance of an element can be changed by following these steps:
- Insert the element you would like to change into the current document.
- Design it to your liking.
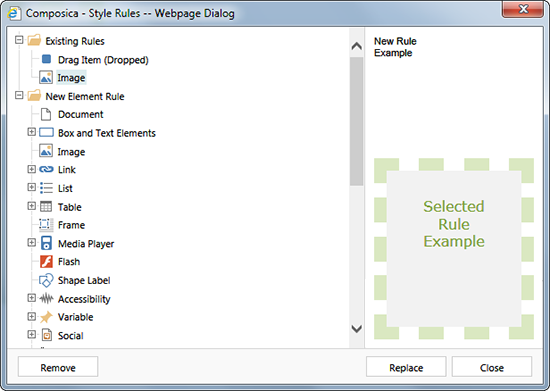
- Open the Element Style Rules dialog using Design > Create Style Rule > Element Rule.
- The element you have styled will be automatically selected in the tree on the left. If the project already has an existing element rule for that element, it will appear under Existing Rules. Otherwise, it will appear under New Element Rule. You may change the default selection to style any other element or element state.
- Press Create (or Replace if a rule already exists).
The style rule will then be automatically applied to any instance of this element, throughout the project, including any future instances. Note that the element style rule only determines the default style for the element, and the style can still be customized for each instance using class style rules or by modifying any of the element’s properties.
Remove
Element Style Rules can be removed in order to revert to the original system style:
- Open the Element Style Rules dialog using Design > Create Style Rule > Element Rule.
- Select one of the rules under Existing Rules.
- Press Remove.
Import
Element Style Rules can be imported from other projects:
- Open the Import Style Rules dialog using Design > Create Style Rule > Import Style Rules.
- Select the project from which you would like to import style rules.
- A list of class and element style rules will appear on the right.
- Check the rules that should be imported.
- Press Import.