 The project pane allows you to overview three aspects of your project: the project tree, the media tree, and the elements tree
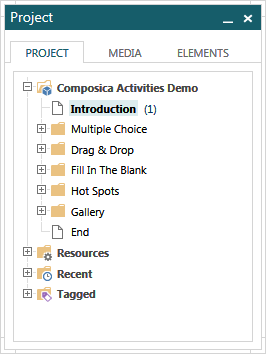
The project tree is similar to the one in the Project Manager. The tree includes the entire outline tree, the resource documents, a recent tree of recently opened documents, and a tagged tree aggregating documents by their tags for quick lookup.
The currently open document is marked in bold in the list. Next to each document’s title, a number shows the number of currently open tasks on the document. If the number is bold, some of these tasks are assigned to the active user.
To open a document from the tree for editing, double-click it or right-click it and use the Open Document menu item. To preview a document, right-click it and use the Preview Document… menu item.
Widgets can also be quickly applied from the tree, by right-clicking and using the Apply Widget menu item.
The media library tree, identical to the one in the Media Explorer, lists all the available media files for the current project.
The tree is divided into two main categories:
- Project, which holds the uploaded media files for the currently open project.
- Public, which is a public media repository available to all projects, divided into different sections.
All the media files are separated according to their types: Images, Video, Audio, Animations, and Misc.
To insert a media file, double-click on it, and it will be inserted to the active document.
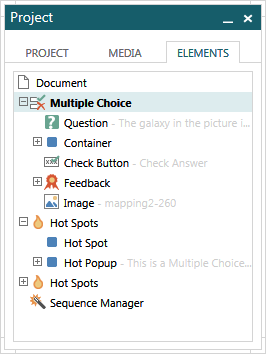 The collapsible elements tree shows all the elements in the document, in a hierarchical format, making it easier to understand the structure of the documents, to find elements in it, and to keep control of the document.
Elements can be selected by pressing them in the tree, and multiple elements can be selected by holding down the Shift or Ctrl keys. The show/hide eye icon can be used to temporarily hide elements, to make complex documents less cluttered and more manageable, without affecting the actual document. The context menu can also be used by right-clicking elements in the tree.
Some relatively positioned elements can be rearranged by dragging them around in the tree: feedback sub-elements, test feedback sub-elements, survey items, and blog widgets.
Additional options related to the elements tree are available:
- The entire tree can be expanded/collapsed using View > Elements Tree > Expand All and View > Elements Tree > Collapse All.
- All elements in the document can be shown/hidden using Design > Show/Hide > Show All and Design > Show/Hide > Hide All.
- When View > Elements Tree > Auto-Collapse Tree is checked, the tree is automatically collapsed to only show the selected element.
- When View > Elements Tree > Start as Collapsed is checked, the tree starts off as collapsed. This option is only available if auto-collapsing is turned off.
To float the pane, either toggle on View > Project Pane > Float, or drag the pane by its caption from its default position. Once floating, you can drag the pane around and position it as you wish.
To dock the pane, either toggle off View > Project Pane > Float, or drag the pane back to its docked position.
To hide the pane, toggle off View > Project Pane > Show..
To show the pane, toggle on View > Project Pane > Show.