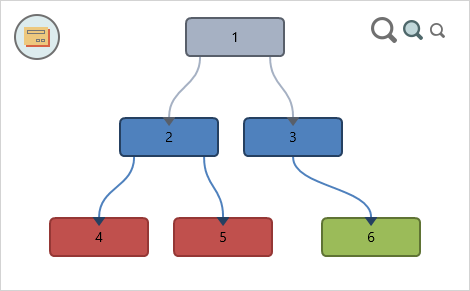
The scenario tree provides an overview of all scenes in the scenario and their connections, as well as provide a convenient way to add or remove scenes, change their settings, and activate them for editing. The scenario tree is only available to the author while designing the document, and is not part of the resulting course. The zoom buttons in the top-right corner allow changing the zoom level of the tree.
To activate the scenario tree, use the Scenario Tree button at the top-right corner of the scene. The button is only available when the mouse is over the scenario element, to provide an unobstructed view of the scene while the mouse is away.
To edit settings of a scene, select the scene in the tree and use the properties grid. Use <Scene / Name> to change the label showing for a scene in the tree. Use <Tree Node / Color> to change the color of a scene node in the tree from the default color.
To add a sub-scene to the selected scene, use Scenario > Add Sub-Scene, or right-click it and choose Add Sub-Scene.
To remove the selected scene, use Scenario > Remove Scene, or right-click it and choose Remove Scene. Removing a scene removes all of its sub-scenes and any links to the scene from other scenes.
To activate the selected scene for editing, either double-click it; right-click it and choose Edit Scene; or use the ![]() handle.
handle.
To activate the scenario master for editing, use the Scenario Master button in the top-left corner.